Docker + Nacos + Spring Cloud Gateway 实现简单的动态路由配置修改和动态路由发现
1.环境准备
1.1 拉取Nacos Docker镜像
从Docker Hub拉取Nacos镜像:
docker pull nacos/nacos-server:v2.4.0 
1.2 生成密钥
你可以使用命令行工具生成一个不少于32位的密钥。以下是使用 OpenSSL 生成 32 字节密钥的示例:
openssl rand -base64 32 
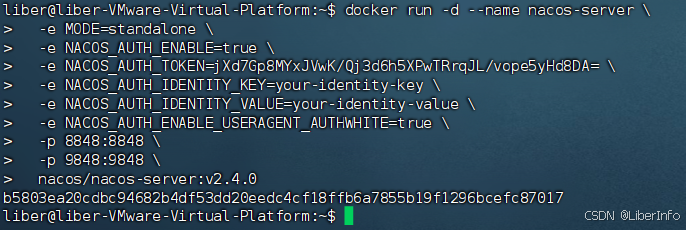
1.3 启动Nacos容器
使用以下命令启动一个Nacos容器:
docker run -d --name nacos-server \ -e MODE=standalone \ -e NACOS_AUTH_ENABLE=true \ -e NACOS_AUTH_TOKEN=jXd7Gp8MYxJVwK/Qj3d6h5XPwTRrqJL/vope5yHd8DA= \ -e NACOS_AUTH_IDENTITY_KEY=your-identity-key \ -e NACOS_AUTH_IDENTITY_VALUE=your-identity-value \ -e NACOS_AUTH_ENABLE_USERAGENT_AUTHWHITE=true \ -p 8848:8848 \ -p 9848:9848 \ nacos/nacos-server:v2.4.0 NACOS_AUTH_ENABLE=true 启用Nacos的身份验证。
NACOS_AUTH_TOKEN的值为正确的 Base64 编码字符串,长度不少于 32 字节。
NACOS_AUTH_IDENTITY_KEY=your-identity-key 设置身份验证的key。
NACOS_AUTH_IDENTITY_VALUE=your-identity-value 设置身份验证的value。
NACOS_AUTH_ENABLE_USERAGENT_AUTHWHITE=true 启用User Agent白名单,绕过一些安全检查。
1.4 访问Nacos控制台
在Nacos容器启动后,可以通过浏览器访问Nacos控制台,URL如下: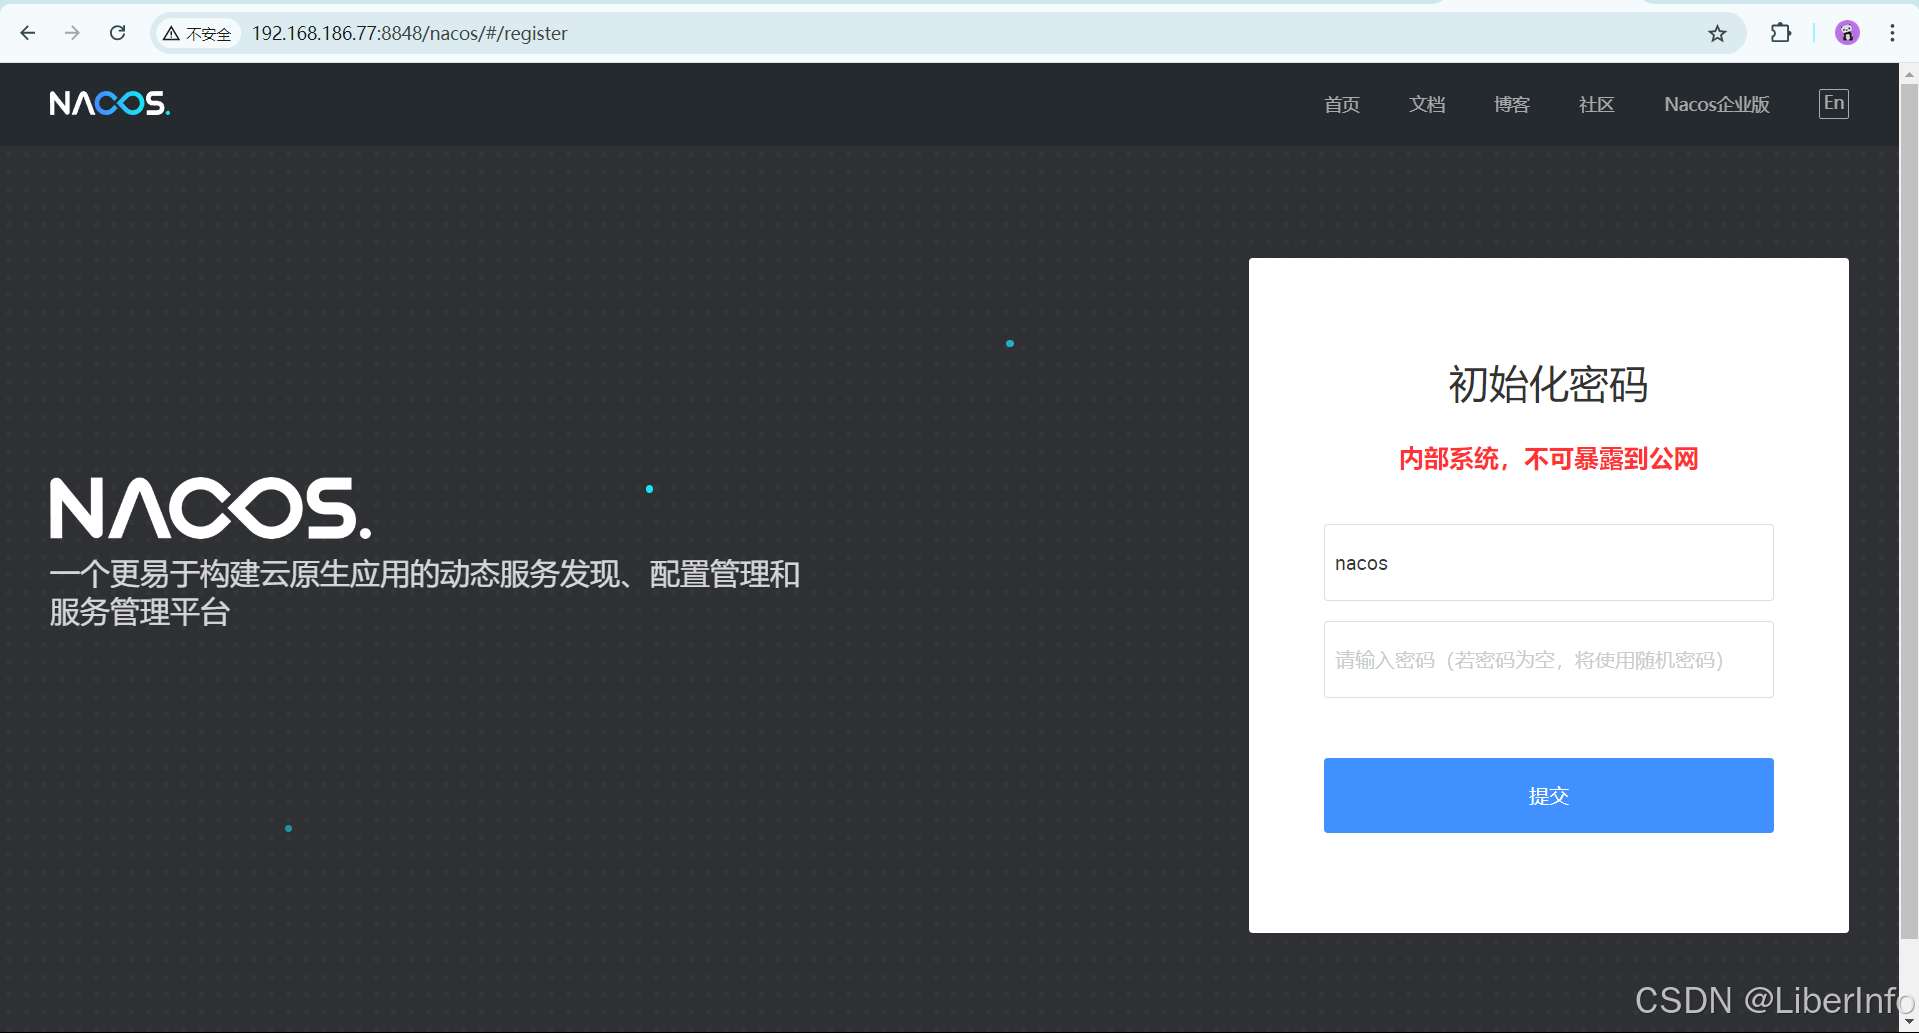
说明:初始化密码。
1.5 创建命名空间

操作:点击命名空间,新建命名空间。
说明:自己随便定义命名空间,随便描述。
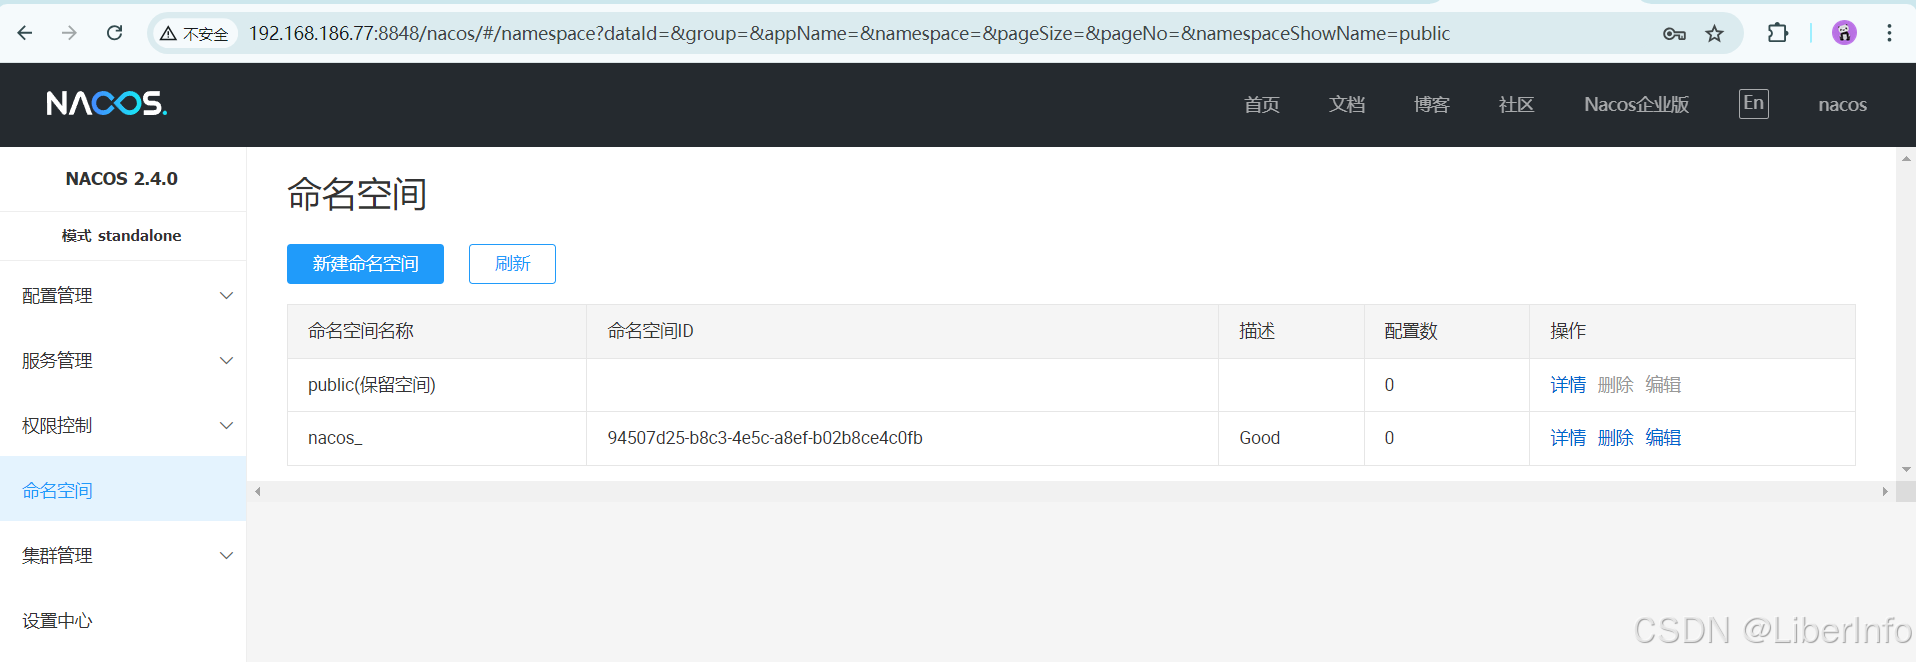
说明:创建结果。
1.6 创建配置
1.7 创建gateway.yaml
hello: abc 
说明:用来测试是否读取到配置信息,点击发布即创建。
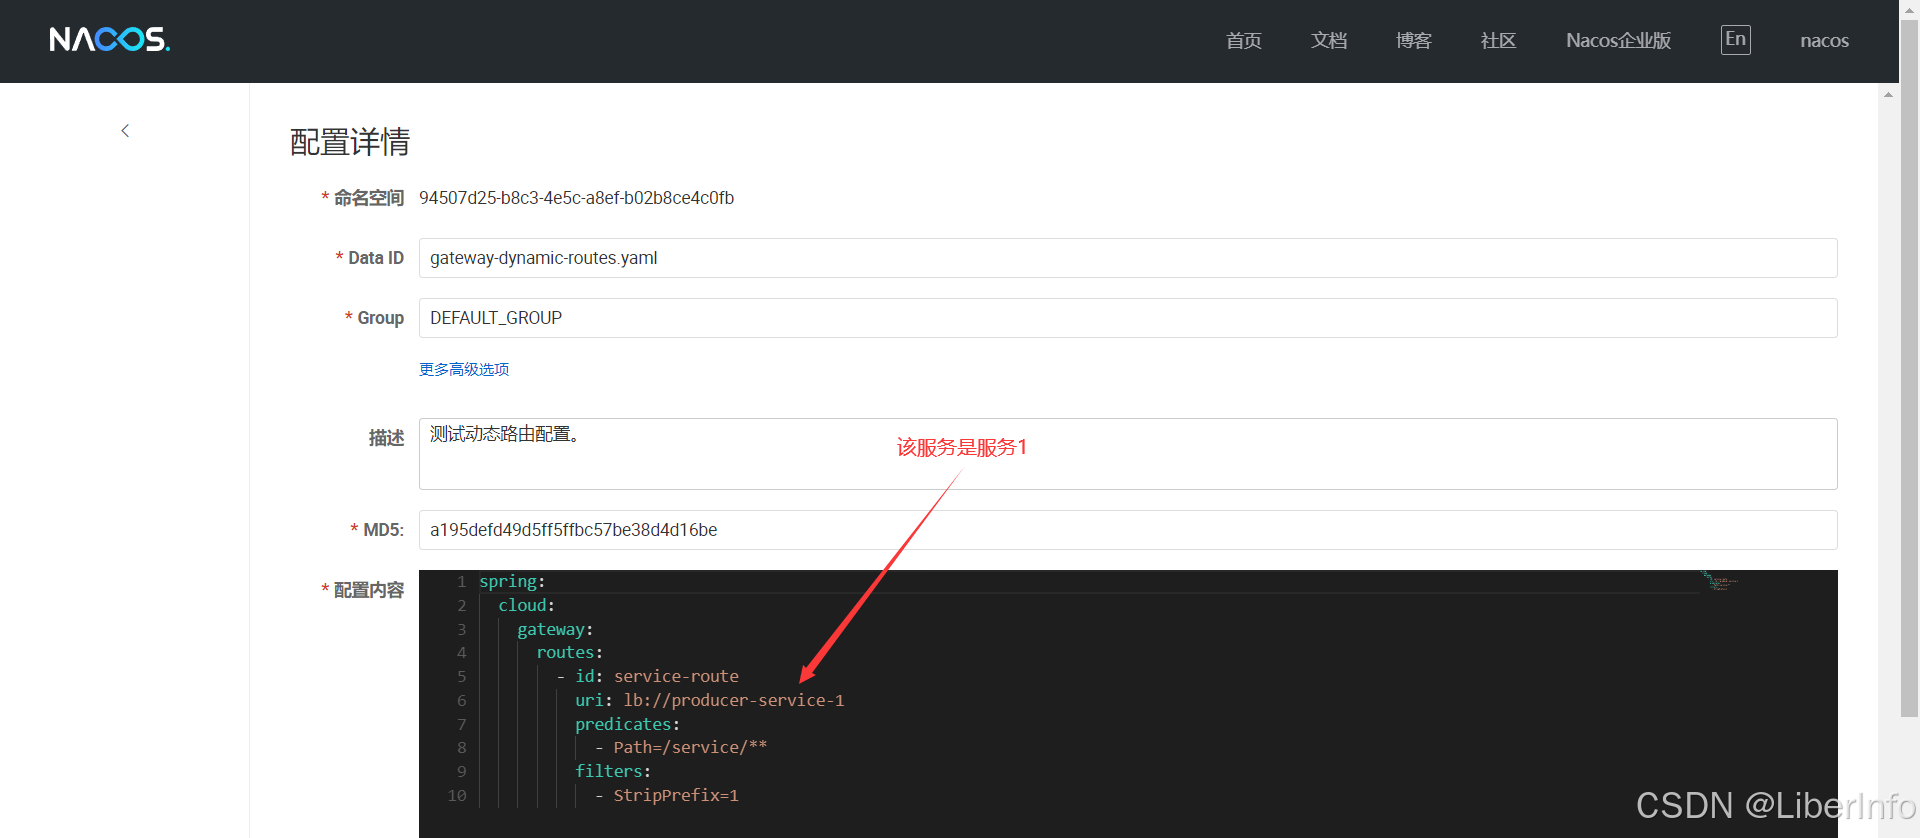
1.8 创建gateway-dynamic-routes.yaml
spring: cloud: gateway: routes: - id: service-route uri: lb://producer-service-1 predicates: - Path=/service/** filters: - StripPrefix=1 说明:
请求匹配:当客户端发送一个HTTP请求时,Spring Cloud Gateway会根据定义的路由进行匹配。它会首先检查请求路径是否匹配Path=/service/**这个谓词。
前缀移除:如果请求路径匹配,StripPrefix=1过滤器会移除路径的第一个部分。例如,客户端请求/service/produce会被转换为/produce`。
请求转发:经过前缀移除后,Gateway会根据uri配置将请求转发到producer-service-1服务。由于lb://前缀的存在,Gateway会通过服务注册中心(如Eureka或Consul)找到producer-service-1服务的一个实例,并将请求转发给该实例。

说明:测试动态路由配置,点击发布即创建。
1.9 创建结果

说明:自定义的命名空间下创建两个配置文件。
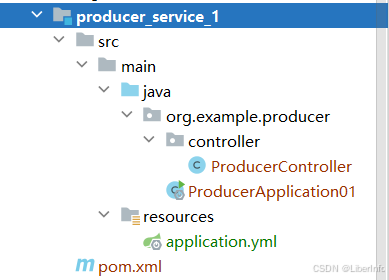
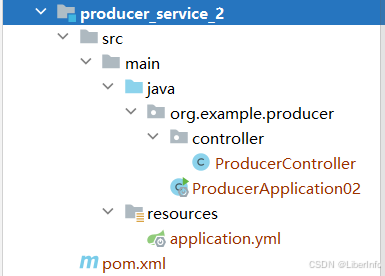
2.项目结构

说明:使用两个服务,代表不同的路由,模拟在没有重启网关服务的条件下实现,通过Nacos修改配置文件实现网关路由的配置更新与发现。
2.1 pom.xml(父类)
4.0.0 org.springframework.boot spring-boot-starter-parent 3.3.2 org.example spring_nacos_gateway 0.0.1-SNAPSHOT pom producer_service_1 producer_service_2 17 org.springframework.boot spring-boot-starter-web org.springframework.boot spring-boot-maven-plugin 说明:两个提供者的父类配置文件,网关模块不需要父类。
2.2 gateway模块

2.2.1 pom.xml
4.0.0 org.example gateway 0.0.1-SNAPSHOT 22 3.3.2 2023.0.1 2023.0.1.2 org.springframework.boot spring-boot-dependencies ${spring-boot.version} pom import org.springframework.cloud spring-cloud-dependencies ${spring-cloud.version} pom import com.alibaba.cloud spring-cloud-alibaba-dependencies ${spring-cloud-alibaba.version} pom import org.springframework.boot spring-boot-starter-webflux org.springframework.cloud spring-cloud-starter-gateway com.alibaba.cloud spring-cloud-starter-alibaba-nacos-discovery com.alibaba.cloud spring-cloud-starter-alibaba-nacos-config org.springframework.boot spring-boot-starter-actuator org.springframework.cloud spring-cloud-starter-loadbalancer org.springframework.cloud spring-cloud-starter-bootstrap com.alibaba.nacos nacos-client 2.4.0-BETA ch.qos.logback logback-classic 1.5.6 com.alibaba.nacos logback-adapter 1.1.1 org.slf4j slf4j-api 2.1.0-alpha1 io.grpc grpc-netty 1.57.2 2.2.2 nacos-logback14.xml
${LOG_DIR}/${APP_NAME}.log %d{yyyy-MM-dd HH:mm:ss.SSS} [%thread] %-5level %logger{36} - %msg%n ${LOG_DIR}/${APP_NAME}-%d{yyyy-MM-dd}.%i.log 10MB 30 2.2.3 bootstrap.yml
spring: application: name: gateway-service cloud: nacos: discovery: server-addr: 192.168.186.77:8848 username: nacos password: 123456 config: server-addr: 192.168.186.77:8848 file-extension: yaml group: DEFAULT_GROUP namespace: 94507d25-b8c3-4e5c-a8ef-b02b8ce4c0fb #命名空间的ID encode: UTF-8 username: nacos password: 123456 gateway: discovery: locator: enabled: true # 启用动态路由发现功能。 lower-case-service-id: true #将服务ID转换为小写 config: import: - nacos:gateway.yaml #配置文件1 - nacos:gateway-dynamic-routes.yaml #配置文件2 server: port: 8003 说明:通过以上配置,Spring Cloud Gateway将会自动根据Nacos中的注册服务动态生成路由。例如,如果有一个服务 order-service 注册到Nacos,Gateway将自动为这个服务生成一个路由规则,将所有以 /order-service/** 开头的请求转发到该服务。
2.2.4 GatewayApplication.java
package org.example; import org.springframework.boot.SpringApplication; import org.springframework.boot.autoconfigure.SpringBootApplication; import org.springframework.cloud.client.discovery.EnableDiscoveryClient; import org.springframework.cloud.client.loadbalancer.LoadBalanced; import org.springframework.context.annotation.Bean; import org.springframework.web.client.RestTemplate; @SpringBootApplication @EnableDiscoveryClient public class GatewayApplication { public static void main(String[] args) { SpringApplication.run(GatewayApplication.class, args); } @Bean @LoadBalanced //启动请求的负载均衡 public RestTemplate restTemplate() { return new RestTemplate(); } } 2.2.5 ConfigController.java
package org.example.gateway; import org.springframework.beans.factory.annotation.Value; import org.springframework.cloud.context.config.annotation.RefreshScope; import org.springframework.web.bind.annotation.RequestMapping; import org.springframework.web.bind.annotation.RestController; @RestController @RequestMapping("/config") @RefreshScope public class ConfigController { @Value("${hello:false}") private String Hello; @RequestMapping("/get") public String get() { return Hello; } } 2.3 producer_service_1模块
2.3.1 pom.xml
4.0.0 org.example spring_nacos_gateway 0.0.1-SNAPSHOT producer_service_1 jar com.alibaba.cloud spring-cloud-starter-alibaba-nacos-discovery 2023.0.1.2 2.3.2 application.yml
server: port: 8001 spring: application: name: producer-service-1 cloud: nacos: discovery: server-addr: http://192.168.186.77:8848 username: nacos password: 123456 2.3.3 ProducerApplication01.java
package org.example.producer; import org.springframework.boot.SpringApplication; import org.springframework.boot.autoconfigure.SpringBootApplication; import org.springframework.cloud.client.discovery.EnableDiscoveryClient; @SpringBootApplication @EnableDiscoveryClient public class ProducerApplication01 { public static void main(String[] args) { SpringApplication.run(ProducerApplication01.class, args); } } 2.3.4 ProducerController.java
package org.example.producer.controller; import org.springframework.web.bind.annotation.GetMapping; import org.springframework.web.bind.annotation.RestController; @RestController public class ProducerController { @GetMapping("/produce") public String produce() { return "服务提供者1号"; } } 2.4 producer_service_2模块
说明:实际上,该部分跟producer_service_1结构完全一样,只是改了一下启动类名还有端口配置。
2.4.1 pom.xml
4.0.0 org.example spring_nacos_gateway 0.0.1-SNAPSHOT producer_service_2 jar com.alibaba.cloud spring-cloud-starter-alibaba-nacos-discovery 2023.0.1.2 2.4.2 application.yml
server: port: 8002 spring: application: name: producer-service-2 cloud: nacos: discovery: server-addr: http://192.168.186.77:8848 username: nacos password: 123456 说明:端口跟服务名同producer_service_1模块不一样。
2.4.3 ProducerApplication02.java
package org.example.producer; import org.springframework.boot.SpringApplication; import org.springframework.boot.autoconfigure.SpringBootApplication; import org.springframework.cloud.client.discovery.EnableDiscoveryClient; @SpringBootApplication @EnableDiscoveryClient public class ProducerApplication02 { public static void main(String[] args) { SpringApplication.run(ProducerApplication02.class, args); } } 2.4.4 ProducerController.java
package org.example.producer.controller; import org.springframework.web.bind.annotation.GetMapping; import org.springframework.web.bind.annotation.RestController; @RestController public class ProducerController { @GetMapping("/produce") public String produce() { return "服务提供者2号"; } } 说明:启动类同producer_service_1模块不一样,方便区分。
3.测试验证
3.1 测试读取配置文件(gateway.yaml)

3.2 动态路由发现测试

解释:Spring Cloud Gateway将会自动根据Nacos中的注册服务动态生成路由。例如,如果有一个服务 order-service 注册到Nacos,Gateway将自动为这个服务生成一个路由规则,将所有以 /order-service/** 开头的请求转发到该服务,本案例的服务是producer-service-2,自行类比·。
3.2 手动修改配置重新发布(gateway-dynamic-routes.yaml)
未修改前:
访问:

修改:
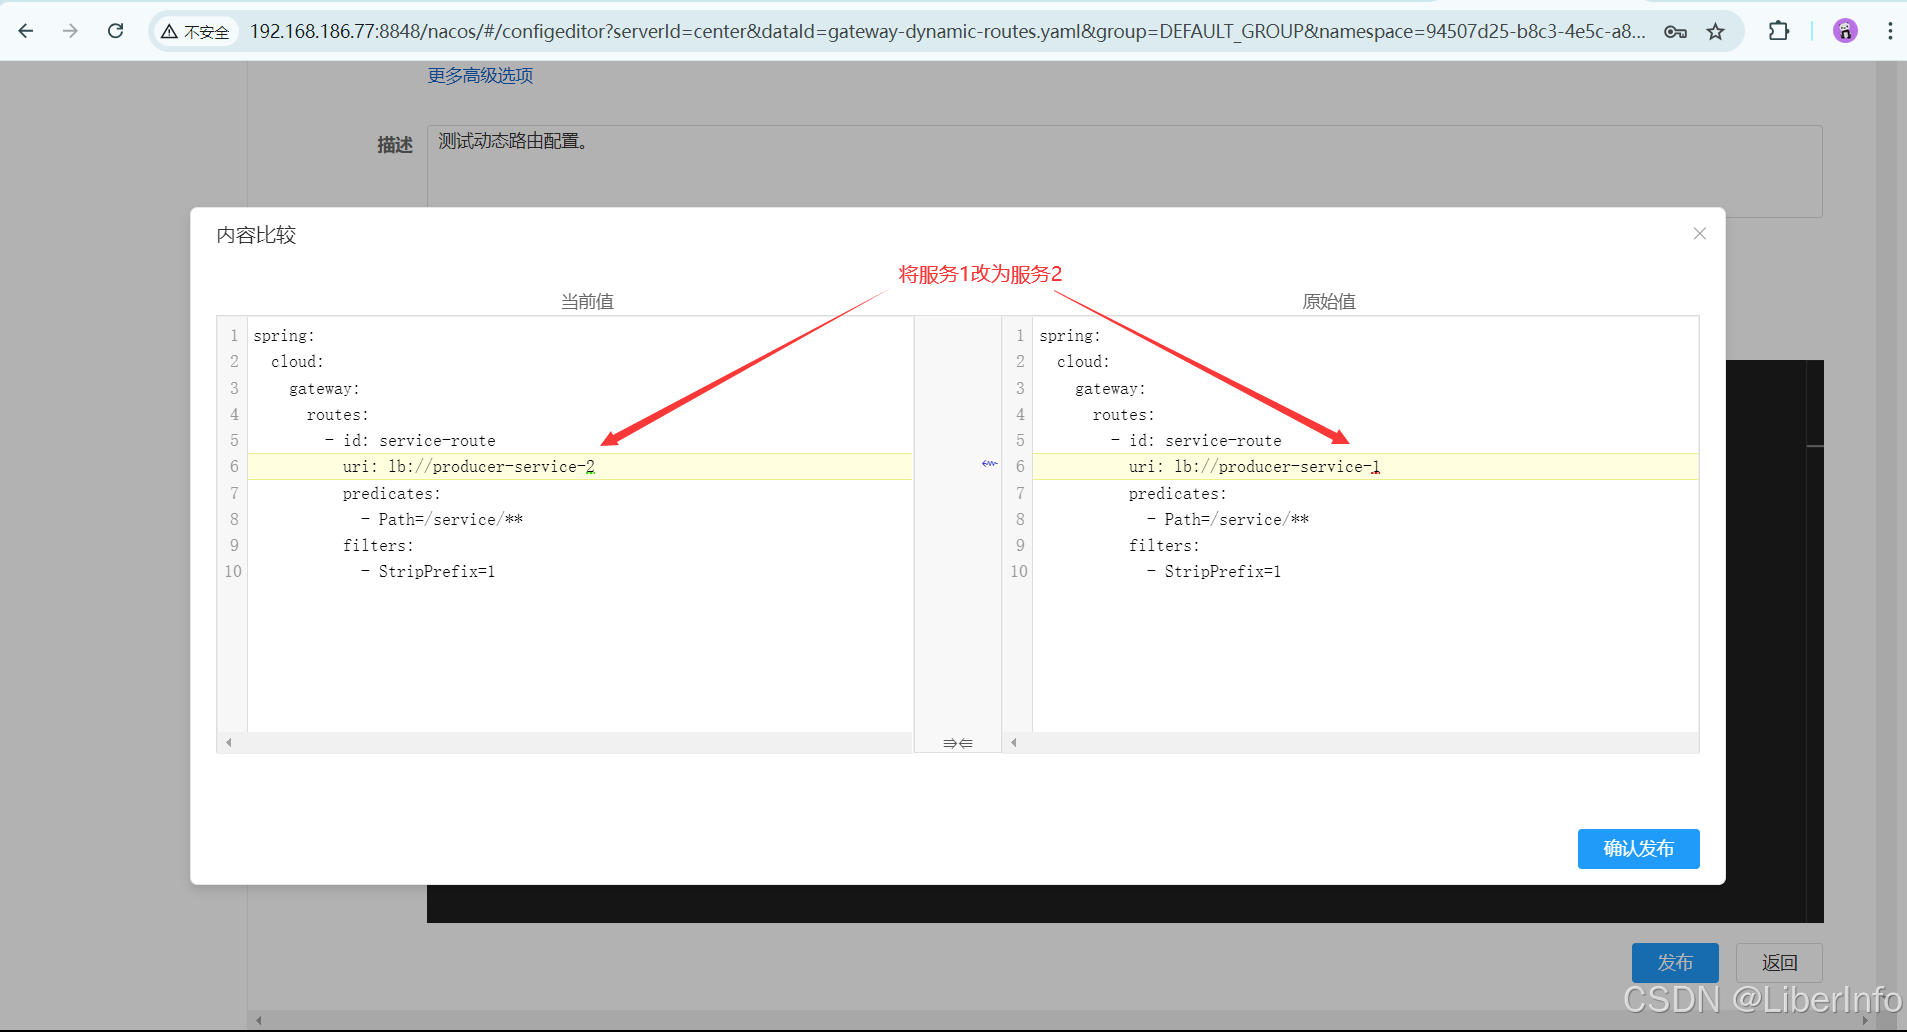
访问:

4.总结
静态路由:是在配置文件或配置中心中手动定义并且不会自动改变的路由。管理员需要手动添加或更新路由配置。
动态路由:是指路由条目根据实时的网络状态或服务注册信息自动更新。使用服务发现机制,路由器能够自动感知到服务的变化,并调整路由表。
静态路由 vs 动态路由
| 特点 | 静态路由 | 动态路由 |
|---|---|---|
| 配置方式 | 手动配置 | 自动配置 |
| 维护复杂度 | 高 | 低 |
| 适应网络变化 | 差 | 强 |
| 使用场景 | 小型、固定网络 | 大型、动态变化网络 |
| 依赖性 | 低(不依赖服务注册中心) | 高(依赖服务注册中心) |
在Nacos中,静态路由适用于固定的、手动管理的路由配置,而动态路由适用于自动化、高效管理的动态变化的服务路由配置。根据实际需求选择合适的路由方式可以提升系统的灵活性和可维护性。